
Are you starting a social media campaign for your book? You should create a bulk upload sheet to help manage your posts! Bulk upload sheets, also known as BUSes, house the numerous social media post materials for a social media marketing campaign, keep the campaign organized, and streamline the uploading process to your scheduling platform. If you’re curious about BUS file types, layout, creating your own BUS, and keeping a BUS organized, keep reading!
What does a BUS look like?
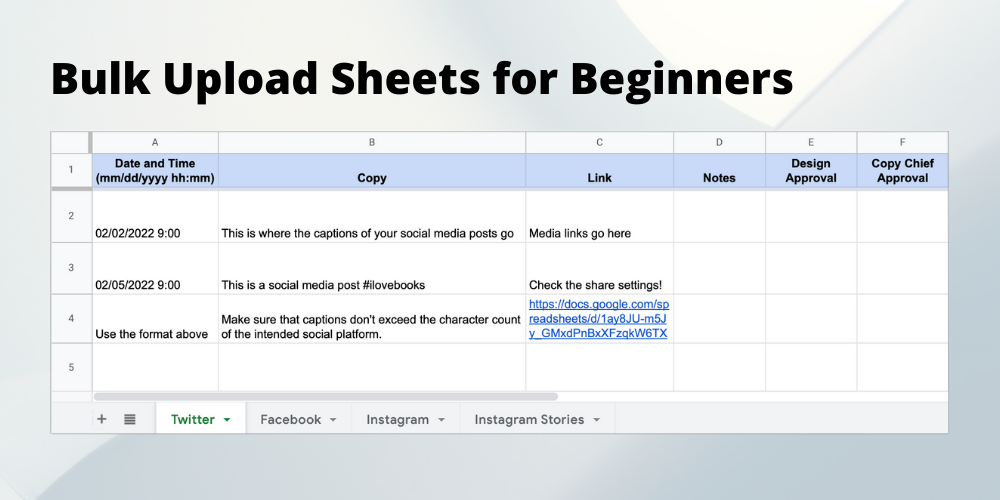
BUSes for social media are less technical and scary than they sound; they’re really just spreadsheets that are specially formatted to organize your social media content in an easy-to-track way. Each column of the spreadsheet is given a title as a header such as “Date and Time,” “Copy,” and “Link,” and your various post materials and the timing information go in the rows below. BUSes usually also have multiple tabs within the spreadsheet to separate your materials by their intended social media platform.
At Ooligan Press, we have several additional columns to the right of the first three columns that are designated as “Notes,” “Design Approval,” and “Copy Chief Approval” sections. These extra columns help the press communicate about which posts have been approved by Ooligan’s current design manager and copy chief, about if revisions are needed (via the Google Sheets “comment” and “assign” functions), and about which posts are ready to be scheduled. However, your extra columns should be tailored to the size of your campaign, the length, and the size of your marketing team. For example, if your social media campaign includes plans for fifty social media posts per platform, across three separate social platforms, with a campaign duration of three months, you might want additional columns for second and third editing passes over your post captions and media.
How do I make a BUS?
Making a BUS for your social media campaign is easy! Just open Google Sheets (free with a Gmail account and suggested for BUSes) and fill out the first row of cells with the headings “Date and Time (mm/dd/yyyy hh:mm),” “Copy,” and “Link.” I recommend bolding these and coloring the first row’s cells so the titles of each column are obvious. I also suggest adding an extra column or two for editing passes and reminders/notes like mentioned, but otherwise, you’ve built your first BUS! Now your BUS is ready for your social media post materials.
How do I use the BUS and keep it organized?
To start using your BUS, just copy and paste the social media post captions and media you’ve created under the corresponding columns (captions under “Copy,” Google Drive links to media under “Links”—remember to change share settings on media files to “anyone with the link can view”). Then select the date and time for each post to publish and record it in the first column following the heading’s suggested format. As you finalize the materials for each post, I suggest using a highlighting system to keep track of which posts have been scheduled. At Ooligan, we keep it simple. When a row of the spreadsheet’s cells are filled yellow, it means the post materials have been reviewed and are ready to schedule. Green rows mean that the post has been uploaded to your social media scheduling platform. Red rows mean a post hasn’t been scheduled yet and is on a time crunch.
How do I schedule posts in advance?
To schedule posts in advance, you need a third party scheduling platform like Hootsuite or Later. Both platforms offer a free plan to schedule a small number of posts at a time across two to three social media platforms. Other scheduling platforms offer similar free scheduling plans with their own set of restrictions, but if both Hootsuite’s and Later’s free plans don’t fit your BUS needs, you may need to look into a paid scheduling plan. Luckily, these are fairly inexpensive, with Later’s plans starting at $8/month and Hootsuite’s starting a bit pricier at $49/month, as of February 2022. BUS posts can be scheduled individually on platforms like Hootsuite and Later, or with a few minor layout edits, you can upload your BUS posts in batches by downloading the BUS as a CSV file and uploading it directly to your scheduling platform.
Happy bulk uploading!